Saturday, December 24, 2011

Christmas Eve

Getting all prepared for Christmas day and tonight's dinner. Looking forward to that duck tonight. Yum. Christmas cookies were baked last weekend. Caneles were made this week and a cranberry pudding cake was done today. Almost there.

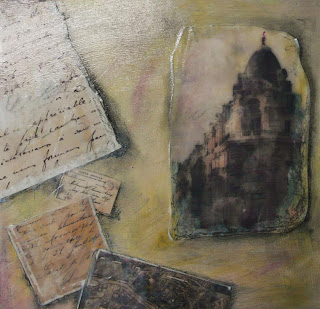
This year's Christmas card. Originally taken in Paris in 2010 at the store Merci.
Like that message of Thanks.

All the best to everyone out there this holiday season. Hopefully during this bit of a break I can actually post new things and get some creating done.


Saturday, December 10, 2011

Decorations outside

Well it finally stopped raining a couple of days ago and the sun was out today and it was lovely so I was able to pop out to take these finally.

Daytime

My brother made the birch reindeer

the berries are from our vine in the backyard

Already a casualty of a broken ornament. Got to have one a season.

Nightime


And there are more lights going down the length of the fence

Nice day out in the morning shopping at the market and thinking about Christmas meals. After taking these pictures tonight, I think I would like a new tripod on my Christmas list. Need a better head on the tripod - one that I can trust. I watched as my camera slowing started turning in portrait format. Not something you want for doing long exposure, although that effect could be interesting.

Monday, December 5, 2011

Chicago on my mind


Still thinking about Chicago even though it was over a week ago. Had such a great time and great food. Can't wait to go back. So here are some panoramas from the trip.

Sunday, December 4, 2011

Starting to look a lot like Christmas

So today was decorating day around here. We already had some lights outside (since it was raining, pics of that will come later). Just a mini tree this year but that meant more lights for elsewhere.


This is also a way to keep playing with long exposure.


Wednesday, November 23, 2011

Canelé

Today is a baking/cooking day. I like days like this. I'm still creating although I do feel a bit guilty as I feel like I'm having too much fun.


After sitting "brewing"(?) for nearly 3 days, the canelé mixture was ready. It's best to let it sit for at least a couple of days and I'm happy to say I think it paid off! It immediately took me back to Bordeaux and just over a month ago when I first ate one of these perfect little treats. Thanks to Chocolate and Zucchini where I seem to have found the best and least complicated recipe for them. I bought two sets of moulds - one a little bit bigger than the other (the latter I found in Auchan for just 3 Euro!). It also pays to let them bake just that little bit longer for that caramel-y like appearance. It's hard to describe how you have to almost break the outside "skin" to get at the egg-y goodness inside. Bliss.

Now waiting for my squash soup simmering away in the Le Creuset that I (re:hubby) lugged home from Bordeaux. Just too good of a price to miss!

Friday, November 18, 2011

Getting Ready for a sale - Magnets!

magnets


Still getting ready for the sale. It's tomorrow! I think everything is set but I may need a last minute trip to the art store. New this year - magnets. I've been using the same photo transfer technique and I've also added paint to some.

Hope it goes well. Still debating about taking some of the panels I've got attached to and are hanging on our living room wall. Hmmm...

Sunday, November 13, 2011

Getting ready for a sale

I already have some photo transfer panels ready for the sale next Saturday (email me if you want details!) but I thought I would try some smaller little canvases that I may turn into magnets. We'll see. Already prepped some photos (see the tutorial from earlier posts) and just waiting for them to dry before applying them to the mini canvases that I got here and in Bordeaux.

Here are some of the images I've been working on.

Geneva


San Francisco


Bordeaux


Bordeaux


Bordeaux

Saturday, November 12, 2011

What I've been up to

Long silence there with no posting but there was another trip to France in there with, of course, more photos.

Saint Emilion

Toulouse

Bordeaux

Now I'm preparing for a one day art and artisan show and a trip to Chicago. I'll try not to be so silent, though.

Saturday, September 3, 2011

Paris Panel

It's been a while since an update but I have been working away and this one has been done for a while now. I've even put it up on the wall in order to live with it for a while to see if it is actually finished.

Wednesday, August 10, 2011

Tutorial - Making a photo transfer

As promised, here's that tutorial. Photo transfers are fun and can add an element of collage to a work or be used entirely by itself. Generally you would want to put the transfers on a panel but you can also use them in other creative ways including lampshades (since they are almost transparent) or shadow boxes. I've found that self-levelling gel works really well. I came across this quite by accident since the jar looks the same as tar gel and I obviously wasn't paying attention! I started with a layer of self-levelling gel and then an application of tar gel but really the self-levelling works well on its own as long as you do two applications. It also dries faster and smoother.

What you'll need:

A picture printed on plain paper
Knife or scissors
palette knife
self-levelling gel or tar gel
tape
backing board
sponge with scrubby side, if possible


Step 1:

Print out an image onto regular plain paper. The cheaper the better. Pigment inks are best but are not necessary. Any regular print will do. Any true blank area will not show white in the final. So remember that when choosing your image and choosing what to show and what not.


Step 2:

Cut down your picture (if necessary). Leave a bit of a border. You'll see why. You can always cut down the image after its gel application.


Step 3: 

Tape down your image (leaving a bit of a border around the true outside of your image). It's best to tape the paper down to a non-porous board to allow for drying. 


Step 4: 

Take a spatula and coat the picture with the gel in one smooth, even and not too thick coating. Try to minimize air bubbles as these will stay. Do another pass or two to smooth it out if necessary.


Step 5: 

Once dry the gel should now appear see-thru unlike the above. The milky look means it still isn't dry. Drying will depend on humidity in the air but be prepared to wait several hours. Repeat and coat the picture with another application of the gel. This helps with Step 6.


Step 6:

Once the 2nd coat is dry remove the tape (it helps if you score the paper or even just cut the picture away as close to your tape as possible). Wet the picture and your sponge. Start rubbing the back of the picture in a circular motion to remove the paper. Don't rub too hard or have any debris under the picture or folds as this will remove the pigment. Unless you want that look! Wash the transfer when you've got the paper off just to clean it up.


Step 7: 

Now hang to dry. Because you left a little bit of extra space around the picture you don't have to worry too much about your hanging method leaving any indentation.

Step 8: 

When dry you can apply your transfer in any way you like. If you're applying it to a panel then any type of binder medium will work to adhere it.

Enjoy your new photo transfer!

Monday, August 8, 2011

Coming soon - Tutorial!

Here's an image I'm working on for a tutorial. Things are drying, pictures are being taken but soon there will be a post for a how-to for photo transfers.

Wednesday, July 13, 2011

More from my night out

Here are more pics from the night shoot.


Saturday, July 9, 2011

Painting with Light


After a couple of hints from European Chic, I'm back posting again. Been busy finishing classes and recovering from some health inconvenience (how I like to see it). These pictures are from my last photo lighting class and here I'm painting with light. Or rather others are and I'm taking the pictures. 


These are taken at the Distillery District in Toronto. It's a former whiskey distillery that was abandoned for years and used at times for filming but has been re-done as a centre for arts, nice design shops and restaurants.

Tuesday, June 21, 2011

Changing paint with Photoshop

Last day of my class tomorrow (Photo transfers and painting) and I'm stuck with my painting. But instead of going at it with paint again (it's been changed twice) I thought I would use Photoshop to see if lightening the picture was just the thing it needed and I think it is. Stayed tuned for the end result.

Before - the darker version

With Photoshop - lighter

Wednesday, May 18, 2011

Photo transfers

Things got a bit busy with preparing for my show for Contact and starting new classes so it's been a while. But here's some work I've been doing to prove I was doing something while away from here.
Quiet Through Tunnel

I'm taking a course in photo transfers and painting. The primary way being used to transfer an image onto a substrate is with tar gel. It's actually pretty simple and you just use the cheapest paper too (makes a change). Above is my first effort with a photo of a sign that I took in San Francisco applied to a painted panel and then painted around. I tried using leveling gel to make the edges of the photo transfer less obvious. It created an almost resin-like coating. This was not my goal. It didn't really do its leveling magic but I'm happy with the results.

Now onto project #2 and more San Francisco images. This is a bigger panel (the other one was 8 x 10 and this one is 20 x 20). Below are all of the tar gel images with paper rubbed off waiting to be applied to the gesso panel. They're quite shiny so the shininess of the leveling gel at least ties everything together but then loads of varnish would too.
One you've seen before

North Beach hotel

California 

tram

Here we have the panel waiting for painting. This time I applied the images first rather than painting first. I'm going to try to build around the edges of the transfers so they looked more like they are part of the panel rather than applied. We'll see.

now pasted onto panel